Saturday 27 February 2010

A Taste of Spain: Membrillo and Olive Oil Crackers

Isn’t it amazing how food can stir up memories: a place, a person or a moment in time? For example, the taste of rhubarb immediately takes me back to childhood summers every time I taste it -even in January. Just as escargots in garlic butter always reminds me of my Mom. I am always amazed that, even in adulthood, new tastes I encounter continue to create such strong associations.

I can remember clearly the first time I travelled to mainland Spain, tasting so many new flavours. It was August in Madrid and it was so hot I could hardly breathe. Clearly my upbringing in the East coast of Canada did not prepare me for such heat! In an effort to cool down E. suggested that we escape to his family’s summer house in a little town near Avila. What a relief! Though still quite warm I think it was easily 10 degrees cooler than the sweltering heat in Madrid. Having arrived at siesta time to find the local market closed, we proceeded directly to the house. The only food to be found was rice, a few tins of calamares en su tinta and a packet of membrillo in the fridge. We put on the rice to cook and sliced open the packet of membrillo as we waited for lunch. To this day one of my clearest memories is standing in that kitchen tasting the cold, sweet taste of membrillo for the first time.

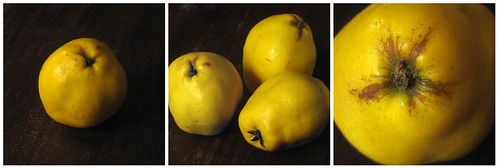
Membrillo is a paste made from boiled down quince and sugar, firmer than jam but softer than pate de fruit. It has a sweet but subtle taste and a slightly grainy texture and is usually served with cheese. Up until last year, when I found a local shop in London that stocked it, it was the one item I always brought back or requested from visitors from Spain. It had never occurred to me that it could be made at home until I saw a recipe for a special Spanish food feature in a magazine a few months ago. This year our local Turkish supermarket has been abundant with quince, and I had originally planned to make membrillo in November when it first appeared, but ended up poaching it instead. So last week finding some fine looking specimens I decided now or never!
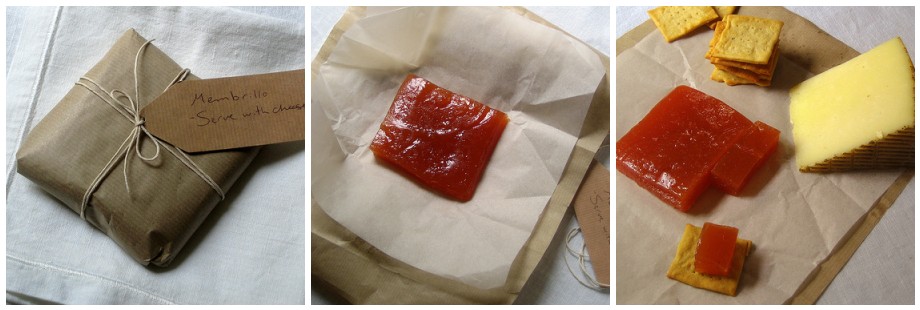
I have to say that I am very pleased with the results and couldn't wait to get some Manchego to accompany it. Though the membrillo & Manchego was amazing on its own, I wanted some sort of contrasting crunch. Having seen a few blogs posting crackers lately, I thought I might give it a try. Who knew that crackers didn't have to come from a box? Trawling through blog after blog I finally found a recipe for Olive Oil Crackers in the Ottolenghi Cookbook. What better way to finish off my project than with olive oil - the quintessential taste of Spain!*

The olive oil in these crackers is intense and would simply not work without it, so is worth using the best available. I love the odd shapes and sizes that shout out "Hey, I am home-made and I am amazing!". Once you see these little wonders become golden in your very own oven, you may never buy crackers again.


Membrillo
Quince puree (I had 1.2 kilos)
Sugar (the same weight as the quince puree)
Juice of 1 lemon
Peel and core the quince and cut into thick slices or chunks place in a large pot with just enough water to cover. Simmer for 40-50 minutes or until soft.

Once soft, drain the water and weigh the cooked quince. With a hand blender (or a food processor) blitz until smooth. Add the quince and sugar to a heavy bottomed pot with the lemon juice ensuring the sugar and quince puree is is mixed through.

Bring to a light boil and turn town to a medium-low heat and let simmer for about 1.5 - 2 hours. Stir and scrape the sides of the pan from time to time to ensure it does not burn or cristalise. Be very careful as the mixture will spit and sputter and there s nothing wore than a hot sugar burn!

The mixture is ready when it turns a pinky/orange colour and is very thick. At this point pour into a pan lined with oiled parchment paper- I used a 33cm x 24cm swiss roll pan. Once cool let the mixture dry out in the oven preheated to 50°C for about 2 hours. Remove from oven and let cool.


Cut into desired size and store in the refrigerator.

Olive Oil Crackers
adapted from
Ottolenghi
250 g plain flour
1 tsp baking powder
115 ml water
25 ml extra virgin olive oil
1/2 tsp salt
1 tsp paprika
1/2 tsp pepper
olive oil for brushing
sea salt to sprinkle (optional)

In a bowl add all the dry ingredients (except sea salt) and mix together with a fork. Add olive oil to water and mix quickly and add to flour mixture. Continue to mix until incorporated. Once the water and flour is incorporated, kneed until it becomes a smooth dough- I used the hook attachment on my hand mixer. Place dough in a bowl wrapped in cling film and place in the fridge for an hour.


Preheat your oven 220 °C just before removing the dough from fridge

Once rested, divide the dough in two halves. On a floured surface roll the dough until about 3mm thick. With a sharp knife or pastry cutter, cut into squares. Mine were about 4cm x 4cm but you can make them an shape or size. Place the dough squares on to a parchment lined baking sheet and prick a few times with a fork. Brush liberally with olive and sprinkle with sea salt (or not).

Bake for 8-10 minutes or until they look like little squares of gold. Remove from the pan and let cool on a wire rack.

Although I didn't try it this time I think these crackers would be absolutely lovely with rosemary or thyme mixed in.


*Ironically, the olive oil I used was not Spanish at all, but actually from Greece.

Sunday 14 February 2010

Black Bottom Heartbreak and Red Velvet Cupcakes


This is the story of a cupcake post that was almost not to be, a story about getting older and wasting perfectly good ingredients; but most importantly a story about learning that sometimes things go wrong and all you can do is reassess your methods and move on! You see, recently Shannoncita had birthday and in the tradition of offices throughout London, and probably the rest of England as well, it is the job of the birthday girl/boy to bring cakes to their colleagues to enjoy. While most people make a quick stop at M&S, after a couple of years I have developed somewhat a reputation in my office: I always bring home-made cakes. As the UK does not have the same baking tradition as we do in Canada, it is kind of a big deal to have something made from scratch and I am only too happy to provide.

After the cheesecake brownies I made (ages ago) were such a success, I decided on a variation of a theme and make a batch of Black Bottom Cupcakes from the cookbook of a famous London bakery; unfortunately it did not go to plan. Maybe I should have realised that the measurements seemed a bit off to begin with -not enough liquid-to-dry ingredients, but it wasn’t until the batter started to clog my hand mixer that I truly realised there was a problem. A quick internet search for similar recipes confirmed my suspicions that there was significantly less liquid than usual and also that the cheesecake mixture was far too liquid to balance the textures properly -not to mention that the cream cheese icing was far too sweet. Though I tried to incorporate enough liquid to solve the problem, it was no use -the cupcakes were ruined! What a heartbreaking waste!

Having to return to work the next day empty-handed, I promised a birthday/valentines compromise for the end of the week. It was an easy decision, a tried and tested classic Red Velvet Cupcakes -after all I had to make use of the cream cheese icing that I had prepared for the failed Black Bottom Cakes!


I have made this cake before, not as cupcakes but as a layer cake, and if it is possible it looks even more beautiful. Layer after layer of red sponge interspersed with the white of the icing. I think this cake is easily E.’s favourite and it’s not hard to see why. The lightness of the cake balances perfectly with the smoothness of the cream cheese icing..., and not to overstate the obvious: the colour is mesmerising!

This cake is a bit unusual because instead of adding the bicarbonate of soda with the other dry ingredients and then mixing with the liquids, this recipe combines all of the dry ingredients (EXCEPT the bicarbonate of soda) and then mixes them with the liquid ingredients to make a smooth batter, finally the bicarbonate of soda is mixed with vinegar and added as fizz at the end -as if it were some sort of fifth grade science experiment. I don’t know of any other cake recipe that does that!

I imagine bakers everywhere were whipping up the same thing for St Valentines Day and I was only too happy to join in.


Red Velvet Cake
adapted from joyofbaking.com
250 g plain flour -sifted
1/2 tsp salt
2 tbsp cocoa powder
115 g unsalted butter -room temperature
300 g caster sugar
2 large eggs
1 tsp vanilla extract
250 ml buttermilk*
2 tbsp liquid red food colouring
1 tsp vinegar
1 tsp bicarbonate of soda


Preheat oven to 175°C and divide 12 cupcake cases in a cupcake pan.

In a bowl sift together the flour, salt, and cocoa powder and set aside.
In a separate bowl, beat the butter until soft and pale in colour. Add the sugar and beat until light and fluffy. Add the eggs, one at a time and once smooth. Add the vanilla and mix by hand until combined.

Mix the buttermilk with the red food colouring in a glass or metal measuring cup (food colouring will stain plastic and your clothes so be careful not to splash). Add half of the flour mixture and then half of buttermilk to the butter mixture, mix until just combined and then repeat.

In a small cup combine the vinegar and baking soda. Allow the mixture to fizz and then quickly fold into the cake batter ensuring that the fizzy mixture is evenly mixed through the batter.

Divide the batter amongst 12 cupcake cases (fairy cake cases will yield more). Bake in the preheated oven for approximately 20-25 minutes, or until a toothpick inserted in the center of the cakes comes out clean. Let the cupcakes cool completely before icing.

*Buttermilk can be easily substituted by adding 1/2 tsp of vinegar or lemon juice to 240ml of milk and letting it sit for 10 minutes.


To be honest I really had to freestyle the icing because it was left over from the Black Bottoms and was sickly sweet, but after a bit of troubleshoting it was something like this:

Cream Cheese Icing*
200 ml double cream
250 g full fat cream cheese -room temperature
250 g mascarpone cheese -room temperature
200 g icing sugar- sifted

Mix the the cream cheese and mascarpone cheese on a low speed until smooth. Add the confectioners and continue to mix until combined.

In a separate bowl whip the cream on high speed until stiff peaks form. Fold the whipped cream into the cream cheese mixture a bit at a time until it is fully incorporated. Cover and place in the refrigerator for an hour.


*You may actually wish to make the icing first as it will be ready to use by the time the cupcakes have cooled.