Saturday, 8 May 2010

Shannoncita à le Cordon Bleu

I can’t believe that it has taken me so long to publish this post but the dreary Spring we are having is causing a bit of a creative block. I will warn you before you get too far that this post does not contain any recipes, but I will try to keep it short and sweet... geeky pun intended!

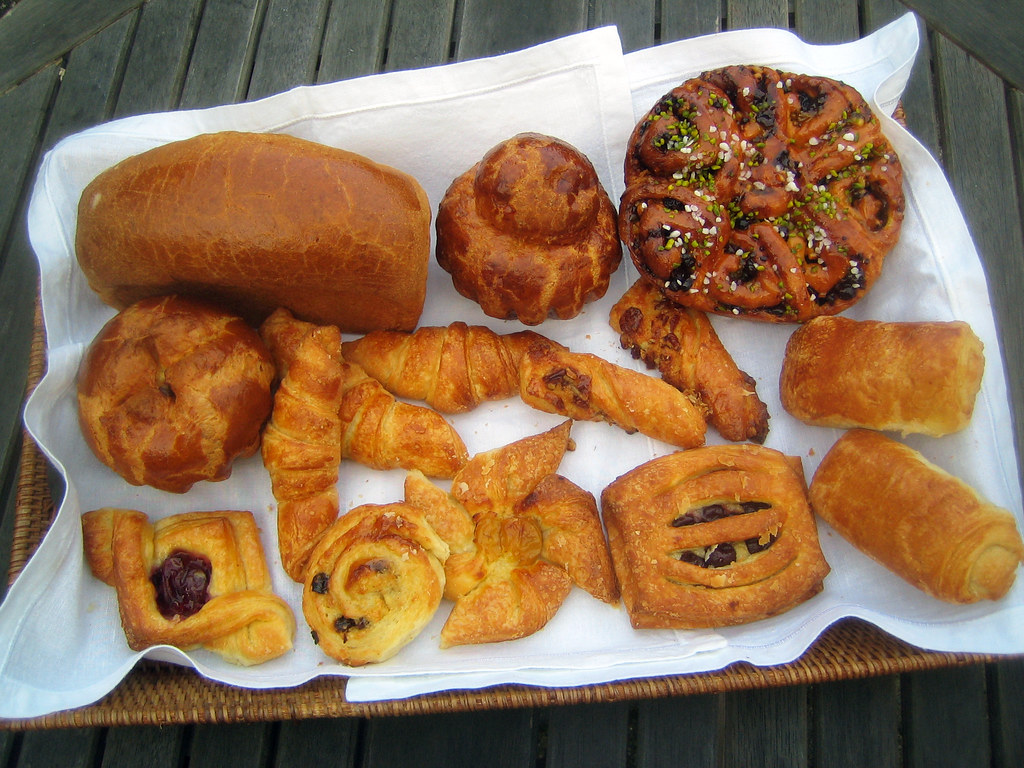
It all started last Autumn. I had tried to sign up for classes at the Cordon Bleu last year but they apparently book up ages in advance, so I signed up to their mailing list for updates -just in case. The moments following the email announcement of new classes arriving in my mailbox are a bit of a blur, but the final result was a booking for two pastry classes, Patisserie a la carte and Viennoiserie... not to mention a substantial hole in my bank account.

As you can imagine, the months of waiting caused a bit of over-excitement and by the time I finally arrived for my class (far too early of course as I feared I’d be late) I was barely able to contain myself. Upon arriving I was given my course pack consisting of the course recipes, a Cordon Blue crested apron and a tea towel. Over the next three days, myself and eight other wannabe patissiers, would cream butter by hand(!), whisk vast amounts of pastry cream and fold various types of laminated doughs.

Our chef instructors were very friendly and patient, answering all of our questions as quickly as we could fire them at them, all the time explaining the importance of each step they were demonstrating. At the end of each day we took home box upon box of pastries not to mention a lot of new skills and experience, but before we knew it our Cordon Bleu experience had come to an end.

Though much of what we learned was not entirely new to me, there was something very fulfilling about recreating it all at the Cordon Bleu. I would highly recommend it to anyone with even the slightest interest in cooking. It was certainly hard work, but being up to my elbows in flour and eggs, not to mention talking to the chefs over those three days, was really a fantastic experience and has really fuelled my desire for career in pastry.

Sunday, 28 March 2010

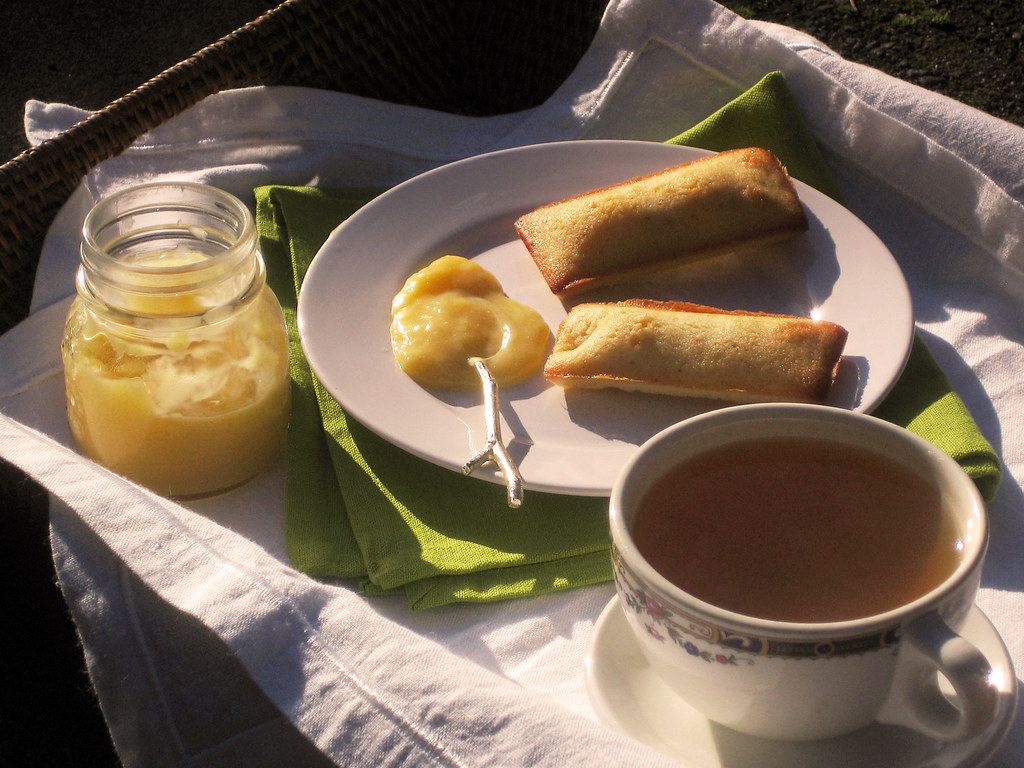
Financiers with Lemon-Lime Curd... you had me at brown butter.


I was beginning to think that Spring might never arrive, it seems to me that it has been dark and rainy for years... but then again I am known to exaggerate a bit. On the bright side, when all seems dark and dreary the little things can really lift your spirits. For example on a typically dark rainy day several weeks ago I arrived home from work to find a parcel waiting for me. I ripped it open to find a lovely tin box of Chinese Flower Tea and a lovely little book sent from my friend Marieke. Marieke, though we haven’t seen each other since she moved to Texas a few years ago, is perhaps the most sunshiny person I have ever known, and this little gift was like a personalised ray of sunshine via Royal Mail. Though I am usually a coffee person I couldn’t wait to taste Marieke’s tea, but I thought it deserved an equally elegant and aromatic accompaniment and I knew just the thing...


I had wanted to make Financiers for a while now but I had been having some difficulty finding the right pans. I know that many people cook them in muffin pans, but I really wanted them to be the little gold bars that they were intended to be in origin (as they were so when first introduced in Paris’ financial district). Finally after a bit of a pan-palaver, involving having to cancel an order that had still not arrived after almost a month, I stumbled across the perfect sized pans (both standard and mini) almost by accident on Ebay listed as a silicone chocolate bar moulds.

Financiers are lovely little tea cakes made with ground almonds, sugar, egg whites and brown butter, also known as buerre noisette. It is worth noting that the difference between melted butter, brown butter and ultimately blackened butter, is no more than a sightly distracted conversation away, so pay attention. You will know when it is ready when the room fills with the smell of toasted hazelnuts. Mmmm... toasty buttered hazelnuts!

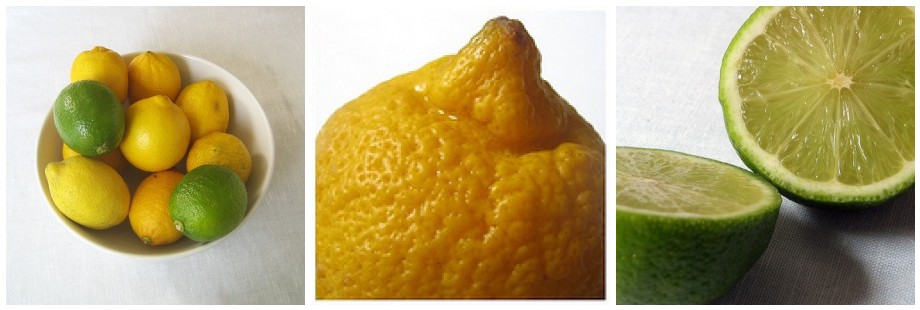
The lemon-lime curd is incidentally the result of the leftover egg yolks, but the zingy citrus contrasts perfectly with the rich buttery almond sponge as if they were somehow made for each other.

So even if the clouds above are grey and wet, these Financiers with Zingy Lemon-Lime Curd will surely to brighten your day..., whether you have them with tea or coffee.


Financiers
adapted from Dorie Greenspan’s Paris Sweets... 
180 g unsalted butter
200 g caster sugar
100 g ground almonds
6 large egg whites
90 g plain flour

Put the butter in a small saucepan and bring it to the boil over medium heat, swirling the pan occasionally. Allow the butter to boil until it becomes a rich brown colour. Pour the browned butter from the pan to a bowl (or it will continue to cook) storing it at room temperature

In a large bowl mix the sugar, flour, salt, and almond meal until blended. Add the egg whites, 1/3 at a time, until fully incorporated. Take a small amount of the batter (2 or 3 tbsp) and mix into the melted butter, once smooth and silky add to the rest of the batter- this will make it easier to combine the butter.

Cover the batter with plastic wrap and refrigerate from 1 hour to 3 days.

Preheat the oven 200 degrees °C. If you do not have silicone moulds, butter the financiers moulds dusting the interiors with flour and tap out the excess.

Fill each mold almost to the top with batter and bake in the middle of the oven for about 10-15 minutes (ovens can really vary!), or until the financiers are golden. When the are done you should be able to press down and they should spring back.

My moulds are about 9 x 4.5 cm (3 x 1 3/4 inches) but if you are making mini financiers you will have to adjust your cooking time accordingly.


Lemon-Lime Curd
250 g caster sugar
6 large egg yolks
1 large egg (whole, lightly beaten)
200 ml lemon or lime juice (or both)
120 g unsalted butter

Combine the butter, lemon juice and sugar in a bain-marie, stirring until the butter is melted sugar is completely dissolved.

Add the egg yolks, one at a time, stirring constantly and then add the lightly beaten egg. Continue stirring until the mixture thick and yogurty in texture- probably about 15-20 minutes.

Pour into sterilised jars or a plastic container if you are going to use it up fairly quickly.

Tuesday, 16 March 2010

Happy St Patrick's Day: Irish Soda Bread


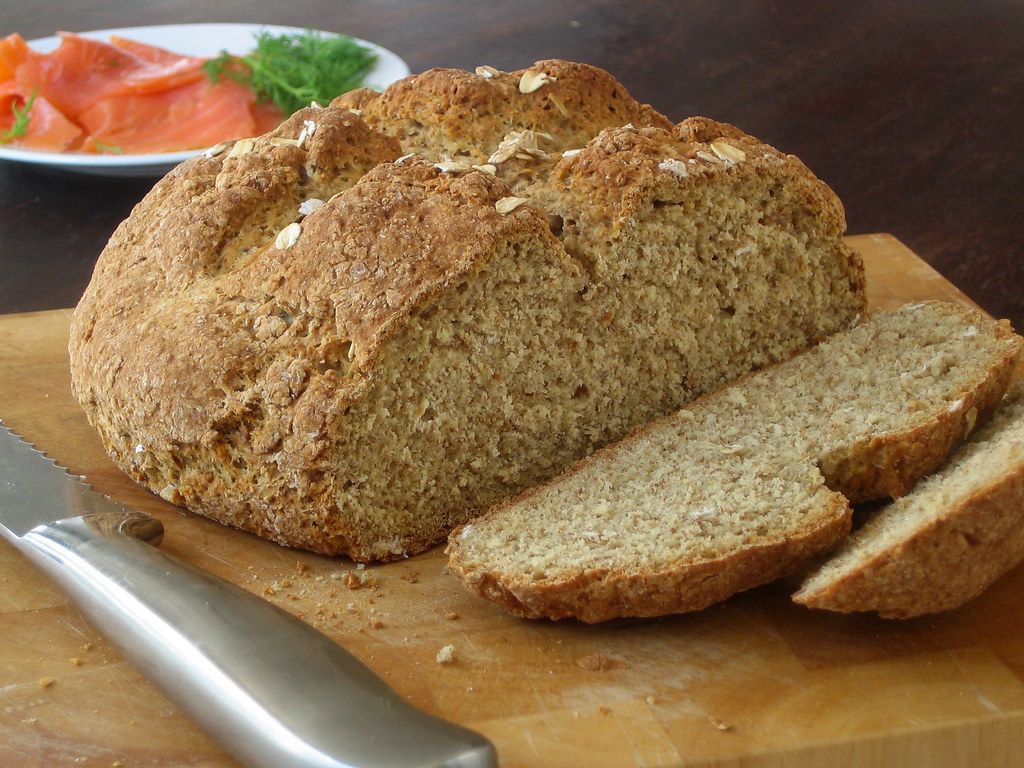
Okay, this one is going to be quick. St Patrick's Day is upon us and I'm gonna keep it simple and fairly understated. Last year I made Guinness and Bailey's Cupcakes, very sweet and a bit over the top. This year staple food - bread. Soda Bread is technically more of a cake than a bread as it does not contain yeast but baking soda, but I figure if half the world can pretend it's Irish every March 17th then this cake can pretend it's bread.

The first time I had Soda Bread was many years ago in Cork, where my then flatmate was from. His mom, a lovely woman who filled me with so much tea I am pretty certain she had shares in a tea company, had made a loaf of what looked like stone and I really only tasted it to be polite. To my surprise I loved it!

Soda Bread is lovely with smoked salmon and dill but I could honestly eat an entire loaf with just butter. It takes no more than 10 minutes to mix up and then in the oven it goes.

Irish Soda Bread
200 g plain flour
200 g whole-meal flour
2 tablespoons light brown sugar
3 tablespoons old fashioned rolled oats
1 teaspoon salt
1 teaspoon baking soda
360 ml buttermilk

Preheat your oven to 190 degrees °C and lightly oiled (or lined with parchment paper) baking tray.

Combine flours, sugar, oats, baking soda, and salt in a large bowl. Make a well in the center of the flour mixture and add 300ml of the buttermilk. Mix with a spoon until the dough comes together, the dough should be moist but not sticky, add more milk if the dough is dry.

Transfer to a lightly floured surface and kneed the dough until smooth, forming a round shape. Place the rounded dough on a lightly oiled baking sheet and cut a cross in the dough with a sharp knife.

Bake for about 40 - 50 minutes or until nicely browned. A handy trick for checking if (most) bread is done is by tapping the bottom of the bread - it will sound hollow. 


Happy St Patrick's Day!

Saturday, 27 February 2010

A Taste of Spain: Membrillo and Olive Oil Crackers

Isn’t it amazing how food can stir up memories: a place, a person or a moment in time? For example, the taste of rhubarb immediately takes me back to childhood summers every time I taste it -even in January. Just as escargots in garlic butter always reminds me of my Mom. I am always amazed that, even in adulthood, new tastes I encounter continue to create such strong associations.

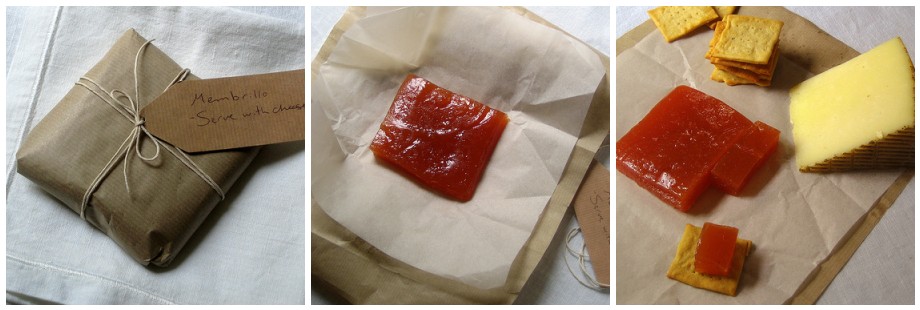
I can remember clearly the first time I travelled to mainland Spain, tasting so many new flavours. It was August in Madrid and it was so hot I could hardly breathe. Clearly my upbringing in the East coast of Canada did not prepare me for such heat! In an effort to cool down E. suggested that we escape to his family’s summer house in a little town near Avila. What a relief! Though still quite warm I think it was easily 10 degrees cooler than the sweltering heat in Madrid. Having arrived at siesta time to find the local market closed, we proceeded directly to the house. The only food to be found was rice, a few tins of calamares en su tinta and a packet of membrillo in the fridge. We put on the rice to cook and sliced open the packet of membrillo as we waited for lunch. To this day one of my clearest memories is standing in that kitchen tasting the cold, sweet taste of membrillo for the first time.

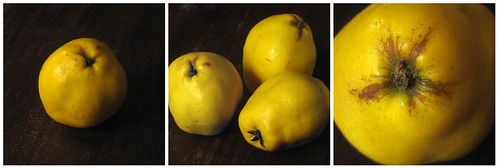
Membrillo is a paste made from boiled down quince and sugar, firmer than jam but softer than pate de fruit. It has a sweet but subtle taste and a slightly grainy texture and is usually served with cheese. Up until last year, when I found a local shop in London that stocked it, it was the one item I always brought back or requested from visitors from Spain. It had never occurred to me that it could be made at home until I saw a recipe for a special Spanish food feature in a magazine a few months ago. This year our local Turkish supermarket has been abundant with quince, and I had originally planned to make membrillo in November when it first appeared, but ended up poaching it instead. So last week finding some fine looking specimens I decided now or never!
I have to say that I am very pleased with the results and couldn't wait to get some Manchego to accompany it. Though the membrillo & Manchego was amazing on its own, I wanted some sort of contrasting crunch. Having seen a few blogs posting crackers lately, I thought I might give it a try. Who knew that crackers didn't have to come from a box? Trawling through blog after blog I finally found a recipe for Olive Oil Crackers in the Ottolenghi Cookbook. What better way to finish off my project than with olive oil - the quintessential taste of Spain!*

The olive oil in these crackers is intense and would simply not work without it, so is worth using the best available. I love the odd shapes and sizes that shout out "Hey, I am home-made and I am amazing!". Once you see these little wonders become golden in your very own oven, you may never buy crackers again.


Membrillo
Quince puree (I had 1.2 kilos)
Sugar (the same weight as the quince puree)
Juice of 1 lemon
Peel and core the quince and cut into thick slices or chunks place in a large pot with just enough water to cover. Simmer for 40-50 minutes or until soft.

Once soft, drain the water and weigh the cooked quince. With a hand blender (or a food processor) blitz until smooth. Add the quince and sugar to a heavy bottomed pot with the lemon juice ensuring the sugar and quince puree is is mixed through.

Bring to a light boil and turn town to a medium-low heat and let simmer for about 1.5 - 2 hours. Stir and scrape the sides of the pan from time to time to ensure it does not burn or cristalise. Be very careful as the mixture will spit and sputter and there s nothing wore than a hot sugar burn!

The mixture is ready when it turns a pinky/orange colour and is very thick. At this point pour into a pan lined with oiled parchment paper- I used a 33cm x 24cm swiss roll pan. Once cool let the mixture dry out in the oven preheated to 50°C for about 2 hours. Remove from oven and let cool.


Cut into desired size and store in the refrigerator.

Olive Oil Crackers
adapted from
Ottolenghi
250 g plain flour
1 tsp baking powder
115 ml water
25 ml extra virgin olive oil
1/2 tsp salt
1 tsp paprika
1/2 tsp pepper
olive oil for brushing
sea salt to sprinkle (optional)

In a bowl add all the dry ingredients (except sea salt) and mix together with a fork. Add olive oil to water and mix quickly and add to flour mixture. Continue to mix until incorporated. Once the water and flour is incorporated, kneed until it becomes a smooth dough- I used the hook attachment on my hand mixer. Place dough in a bowl wrapped in cling film and place in the fridge for an hour.


Preheat your oven 220 °C just before removing the dough from fridge

Once rested, divide the dough in two halves. On a floured surface roll the dough until about 3mm thick. With a sharp knife or pastry cutter, cut into squares. Mine were about 4cm x 4cm but you can make them an shape or size. Place the dough squares on to a parchment lined baking sheet and prick a few times with a fork. Brush liberally with olive and sprinkle with sea salt (or not).

Bake for 8-10 minutes or until they look like little squares of gold. Remove from the pan and let cool on a wire rack.

Although I didn't try it this time I think these crackers would be absolutely lovely with rosemary or thyme mixed in.


*Ironically, the olive oil I used was not Spanish at all, but actually from Greece.

Sunday, 14 February 2010

Black Bottom Heartbreak and Red Velvet Cupcakes


This is the story of a cupcake post that was almost not to be, a story about getting older and wasting perfectly good ingredients; but most importantly a story about learning that sometimes things go wrong and all you can do is reassess your methods and move on! You see, recently Shannoncita had birthday and in the tradition of offices throughout London, and probably the rest of England as well, it is the job of the birthday girl/boy to bring cakes to their colleagues to enjoy. While most people make a quick stop at M&S, after a couple of years I have developed somewhat a reputation in my office: I always bring home-made cakes. As the UK does not have the same baking tradition as we do in Canada, it is kind of a big deal to have something made from scratch and I am only too happy to provide.

After the cheesecake brownies I made (ages ago) were such a success, I decided on a variation of a theme and make a batch of Black Bottom Cupcakes from the cookbook of a famous London bakery; unfortunately it did not go to plan. Maybe I should have realised that the measurements seemed a bit off to begin with -not enough liquid-to-dry ingredients, but it wasn’t until the batter started to clog my hand mixer that I truly realised there was a problem. A quick internet search for similar recipes confirmed my suspicions that there was significantly less liquid than usual and also that the cheesecake mixture was far too liquid to balance the textures properly -not to mention that the cream cheese icing was far too sweet. Though I tried to incorporate enough liquid to solve the problem, it was no use -the cupcakes were ruined! What a heartbreaking waste!

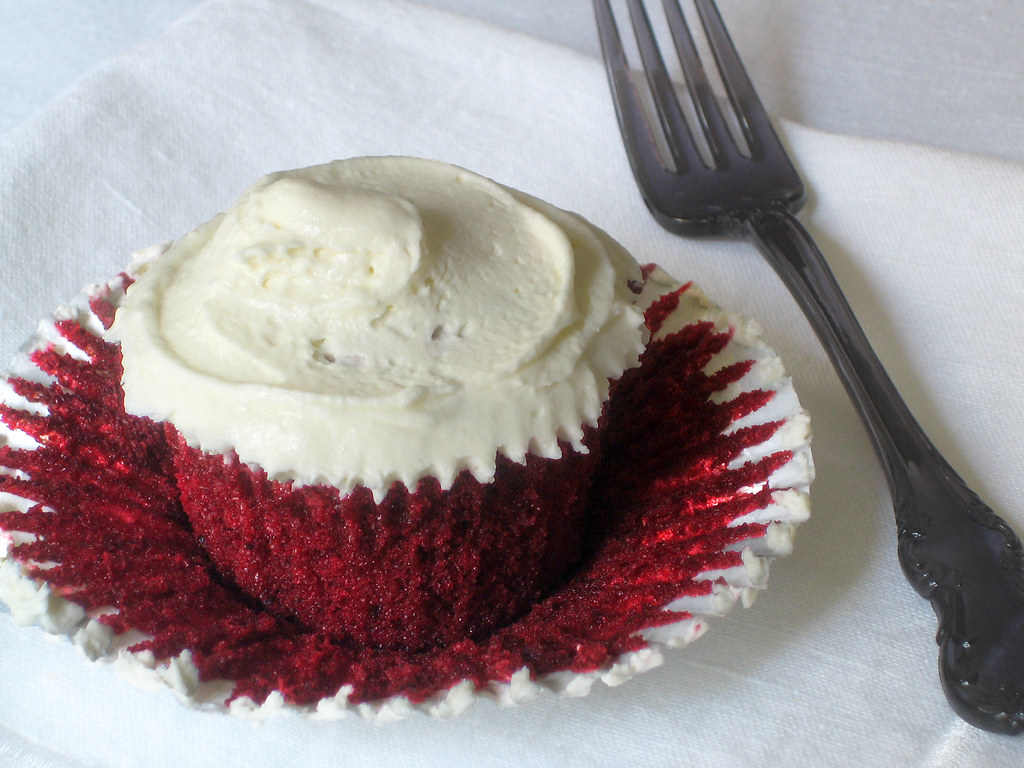
Having to return to work the next day empty-handed, I promised a birthday/valentines compromise for the end of the week. It was an easy decision, a tried and tested classic Red Velvet Cupcakes -after all I had to make use of the cream cheese icing that I had prepared for the failed Black Bottom Cakes!


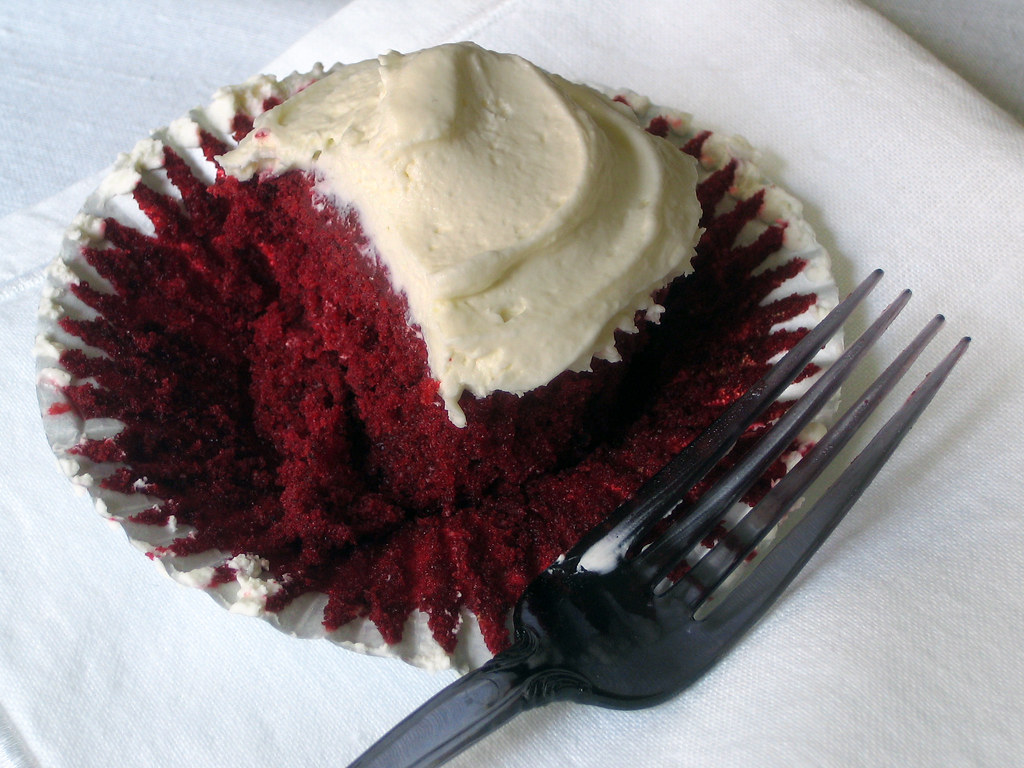
I have made this cake before, not as cupcakes but as a layer cake, and if it is possible it looks even more beautiful. Layer after layer of red sponge interspersed with the white of the icing. I think this cake is easily E.’s favourite and it’s not hard to see why. The lightness of the cake balances perfectly with the smoothness of the cream cheese icing..., and not to overstate the obvious: the colour is mesmerising!

This cake is a bit unusual because instead of adding the bicarbonate of soda with the other dry ingredients and then mixing with the liquids, this recipe combines all of the dry ingredients (EXCEPT the bicarbonate of soda) and then mixes them with the liquid ingredients to make a smooth batter, finally the bicarbonate of soda is mixed with vinegar and added as fizz at the end -as if it were some sort of fifth grade science experiment. I don’t know of any other cake recipe that does that!

I imagine bakers everywhere were whipping up the same thing for St Valentines Day and I was only too happy to join in.


Red Velvet Cake
adapted from joyofbaking.com
250 g plain flour -sifted
1/2 tsp salt
2 tbsp cocoa powder
115 g unsalted butter -room temperature
300 g caster sugar
2 large eggs
1 tsp vanilla extract
250 ml buttermilk*
2 tbsp liquid red food colouring
1 tsp vinegar
1 tsp bicarbonate of soda


Preheat oven to 175°C and divide 12 cupcake cases in a cupcake pan.

In a bowl sift together the flour, salt, and cocoa powder and set aside.
In a separate bowl, beat the butter until soft and pale in colour. Add the sugar and beat until light and fluffy. Add the eggs, one at a time and once smooth. Add the vanilla and mix by hand until combined.

Mix the buttermilk with the red food colouring in a glass or metal measuring cup (food colouring will stain plastic and your clothes so be careful not to splash). Add half of the flour mixture and then half of buttermilk to the butter mixture, mix until just combined and then repeat.

In a small cup combine the vinegar and baking soda. Allow the mixture to fizz and then quickly fold into the cake batter ensuring that the fizzy mixture is evenly mixed through the batter.

Divide the batter amongst 12 cupcake cases (fairy cake cases will yield more). Bake in the preheated oven for approximately 20-25 minutes, or until a toothpick inserted in the center of the cakes comes out clean. Let the cupcakes cool completely before icing.

*Buttermilk can be easily substituted by adding 1/2 tsp of vinegar or lemon juice to 240ml of milk and letting it sit for 10 minutes.


To be honest I really had to freestyle the icing because it was left over from the Black Bottoms and was sickly sweet, but after a bit of troubleshoting it was something like this:

Cream Cheese Icing*
200 ml double cream
250 g full fat cream cheese -room temperature
250 g mascarpone cheese -room temperature
200 g icing sugar- sifted

Mix the the cream cheese and mascarpone cheese on a low speed until smooth. Add the confectioners and continue to mix until combined.

In a separate bowl whip the cream on high speed until stiff peaks form. Fold the whipped cream into the cream cheese mixture a bit at a time until it is fully incorporated. Cover and place in the refrigerator for an hour.


*You may actually wish to make the icing first as it will be ready to use by the time the cupcakes have cooled.

Sunday, 17 January 2010

Happy New Year with Clementine & Almond Syrup Cake


Happy New Year! I realise we are now mid-January, but I am never sure when the cut off date is to stop saying that. Perhaps April would be too late but I think for now we're still okay.

So a new year is upon us, all of the out with the old in with the new. To be honest I don't really believe in New Year's resolutions, I always worry that once you announce resolutions you expose yourself when you just don't quite get around to it. I know that I am a procrastinator, and jut because I am a bit excited and full of sugar from Christmas doesn't mean I am going to decide to change my entire life in an instant.

Though, I have to say that this year has been somewhat of a revelation to me; I finally realised that you actually get things done by doing them. But I certainly didn't have to wait until the New Year to figure that out.

Of course I do have some plans for the coming year..., and for the next decade for that matter. I have a long list of things I plan to cook in the new year and I hope that Shannoncita's Independent Café will continue to grow. E. and I also plan to start a non-baking food blog. So watch this space...

These lovely little cakes were the last thing I baked in 2009. We took them to our neighbours for their New Year get-together. It's funny, we have lived in our flat for almost three years but had only ever exchanged pleasantries until just before this last Christmas when we brought them (and some other neighbours) some mince pies. We had a lovely evening: we met some other neighbours and exchanged stories of our respective Christmas and New Year's traditions just before rushing back home to count down & eat our twelve grapes.


The recipe comes once again from my culinary crush, Yotam Ottolenghi, who has inspired much of my cooking this year. I think that this might just be the best cake ever! A feast for the senses: aromatic, moist not to mention visually stunning.

This cake is best made a day in advance as it actually improves with time as the syrup really permeates the cake, but it tastes great just-baked as well.

Clementine Almond Cake

adapted from Ottolenghi
200g unsalted butter
300g caster sugar
Grated zest of 4 clementines
Grated zest of 1 lemon
280g ground almonds
5 medium free-range eggs, beaten
100g plain flour, sifted
1/8 tsp salt

Clementine Syrup
80g caster sugar
Juice of 4 clementines
Juice of 1 lemon

Preheat the oven to 160°C

Mix butter, 300g of the sugar (the remaining 80g is for the syrup) and citrus zest in a bowl until combined. Add half the ground almonds and continue mixing to fold through. Add the eggs gradually, scraping the bottom and sides of the bowl as you go. Add the remaining almonds, flour and salt, and mix until smooth.

Spoon batter into mini bundt or muffin tins and bake for 25-30 minutes - a skewer should come out a little bit moist.

When the cake is almost cooked, in a small saucepan bring to a boil the remaining sugar and citrus juices then remove from the heat at once. The moment the cakes comes out of the oven, brush all over with the hot syrup, making sure it all soaks through Alternatively, poke the cakes with a skewer while still in the tins and drizzle syrup into the holes. Leave to cool down.

Chocolate Glaze
90g unsalted butter, diced
150g dark chocolate, broken up
½ tbsp honey
½ tbsp cognac

To make the Glaze, put the butter, chocolate and honey in a heatproof bowl and microwave on medium for about 2 minutes- stirring after 1 minute. Once the mixture is completely smooth stir in the cognac. Drizzle the glaze over the cool cakes and allow to set.

Garnish with strips of orange zest and accept praise graciously.

Friday, 25 December 2009

Christmas Pudding: Part 2


Christmas Pudding is a bit controversial for some. Yes it is dense and quite rich but it's just what you need before you start your health-kick in the New Year! Whether it's Christmas Pudding or pie, it's funny that no matter how much we stuff ourselves during Christmas dinner there is always room for desert. Our Christmas Eve dinner of Seafood Bisque and Sea Bass was rounded off perfectly with the fruity, nutty & boozy flavours of the pudding. 

I think the fact that this year I used stoneware pudding basins (in place of the plastic basins of past years) allowed some of the fats to evaporate during the steam process leaving the pudding with a wonderful lightness that complemented rather then overwhelm the main meal.

E., as one could imagine, loves Christmas Pudding. In fact one Christmas a few years ago we even transported a pudding in my suitcase to Madrid for his family to try. Having forgotten to snip a piece of holly from the bush in our garden in London to top the pudding, I was quick to notice the potted holly bush outside a Madrid hotel one day while we were stopped at a red light. In the end it wasn't difficult to convince E. to alter our usual jogging route to include a cheeky trip past that holly bush...


So in the end my Christmas Pudding did not have to bear the shame of being served naked and even though E.'s father continues to threaten to hand me over to the Policía every time we visit, it was definitely worth it.

Happy Christmas!

Wednesday, 23 December 2009

Dreaming of a White Christmas... or at least Gingerbread Snowflakes & Eggnog


This week got off to a start with a particularly festive flavour due to a substantial snow fall in the English capital. I say "substantial" but having been born and raised in he east coast of Canada, most of my family and friends at home would laugh at such an exaggerated description of events. Still in a city like London, which is not accustomed to such weather, anything beyond a light dusting can bring everything to a standstill.

When the snow began to fall I was completing the last bit of shopping in Islington. At first it started as light rain but within a few minutes big fluffy flakes began to fall. In the years I have lived in London I have never seen such a beautiful scene as Upper Street in a blanket of snow. Distinctly Dickensian! How I regret being without a camera or without E. who rarely leaves the house without a camera.

The next morning our neighbourhood was still shrouded in snow. My task for the day was to decorate gingerbread cookies, both for eating and for decorating the tree. While my gingerbread snowflakes are not as beautiful as those that fell from the skies of London, I am still pretty pleased with how they turned out.

Of course gingerbread cookies can be enjoyed with a cup of tea or a simple glass of milk, but in keeping with my frenzy for all things home-made I decided I would make some eggnog. While eggnog is a bit too sweet for my tastes, E. loves it; reminding him of the year he spent in Minnesota when he was a kid. As you can imagine, that experience left E. with a sound understanding of substantial snow fall.

So whether you need a break from shovelling yourself out from your own substantial snowfall or just fancy something sweet, these gingerbread snowflakes & eggnog will warm you from the inside out.


Photos of of our back garden and Alexandra Park by E.

Gingerbread Snowflakes
Adapted from Joyofbaking.com
400 grams plain flour
1/4 teaspoons salt
3/4 teaspoonbaking soda
2 1/2 teaspoons ground ginger
2 teaspoon ground cinnamon
1/2 teaspoon ground nutmeg
1/2 teaspoon ground cloves
120 g unsalted butter
100 g caster sugar
1 large egg
160 ml treacle or molasses

In a large bowl, sift together the flour, salt, baking soda, and spices.

In a separate bowl cream the butter and sugar until light and fluffy. Add the egg and molasses and beat until smooth. Gradually add the flour mixture beating until incorporated.

Divide the dough in half, and wrap each half in plastic wrap and refrigerate for at least two hours or overnight.

Preheat oven to 180 degrees C and place rack in center of oven. Line 2 baking sheets with parchment paper and set aside while you roll out the dough.

On a lightly floured surface, roll out the dough to a thickness of about 1/4 inch. Cut out the cookies with a utter of your choice. With a spatula lift the cut out cookies onto the baking sheet, placing the cookies about 2.5 cm apart.

Bake for about 8 - 12 minutes depending on the size of the cookies and your preference of crispiness. Decorate with royal icing once completely cool.


Eggnog
adapted from Allrecipes.com
475 ml milk
3 whole cloves
1/2 tsp vanilla extract
1/2 tsp ground cinnamon
6 egg yolks
150 g sugar
475 ml light cream
1 tsp vanilla extract
1/4 tsp grated nutmeg

Combine milk, cloves, 1/2 teaspoon vanilla, and cinnamon in a saucepan, and heat over low setting for about 5 minutes. Slowly bring milk mixture to a boil.

In large bowl, combine egg yolks and sugar beating together until fluffy. Slowly add hot milk mixture to egg yolk/sugar mixture one cup at a time beating with an electric mixer at a low speed after each cup.

Once fully incorporated return to the saucepan and cook over medium/low heat, stirring constantly for 3 minutes, or until thick. Do not allow mixture to boil. Strain to remove cloves, and let cool for about an hour.

Stir in cream, vanilla and grated nutmeg.

While you can add your preferred spirit directly to the eggnog I prefer to add it to the mug just before pouring the eggnog. Top with a bit of grated nutmeg.

Sunday, 20 December 2009

Mince Pies


Mince pies are one of those foods that for ages I thought I didn't like. I vaguely remember my mother making mincemeat when I was young but I can't actually remember ever eating it. When I first came to England I found myself constantly refusing mince pies, I imagined them to be heavy and cloying -and admittedly they often are. Eventually, in an effort not to offend someone offering home-made mince pies I tried one and surprisingly found it quite nice. Over the years I have even come to like some of the store bought pies but nothing comes close to home-made.

I suppose I am also a bit of a mince pie traditionalist as I only like them made with shortcrust pastry. Puff pastry or crumble topping somehow seems wrong to me but you can use them if that's your preference -no judgement... I promise.

In previous years, believing that making mincemeat was complicated or a little too labour intensive, I would make my own shortcrust and buy the mincemeat filling. It is actually a good cheat; if you add some citrus zest and a little grated nutmeg you could probably fool most people- as long as the pastry is from scratch. I am one of those people that never buys shortcrust- I know that people are sometimes intimidated by making pastry but it really does take less than 10 minutes (plus extra for chilling) to make. The key is just to keep everything as cold as possible and try to handle the dough as little as possible.

So this year I decided to make my mincemeat from scratch. I searched through so many recipes and eventually came up with my own based on the dozen or so that I looked at. It really is as simple as throwing everything in a pot and cooking until everything is plump and soft. Like Christmas Pudding you can adjust the spices and alcohol to suit your tastes. Mincemeat can be made up to six months in advance so you can make it whenever you have a bit of time. The additional benefit to making mincemeat is that it makes the house smell lovely and festive.

I won't bore you with the detailed history of mince pies except to mention that mince pies have not actually contained meat since the 19th century and most are made with vegetable suet so are vegetarian friendly. You can have them with brandy cream or as they are.


Mincemeat
1 large Bramley apple, peeled, cored and finely chopped
400 g mixed dried fruit
100 g dried cranberries
125 g mixed chopped peel
50g pecans, toasted and finely chopped
125 ml brandy
zest of 1 orange, plus the juice of 2
zest and juice of 1 lemon
1 tbsp orange blossom water
2 tsp mixed spice
1 tsp cinnamon
1/2 tsp ground cloves
1/2 tsp ground ginger
1/2 tsp freshly grated nutmeg
175 g muscovado sugar
100 g shredded vegetable suet

Combine all the ingredients except the muscovado sugar and suet in a large saucepan. Simmer over a low heat for 30 minutes or until the fruit has plumped up and most of the liquid has evaporated but not dry. Remove from heat, once cooled stir in the muscovado sugar and suet.

This recipe makes about twice as much as you need for the pastry but you can store it in steralised jars in a cool place for up to 6 months or give the rest away as gifts.


Shortcrust Pastry
300 g of plain flour
1/2 tsp salt
90 g of cold unsalted butter (cut into small pieces)
60 g of vegetable shortening (I use Trex but Crisco is fine)
3 or 4 tsp ice water

In a food processor blend the flour and with the butter and shortening until its combined to a sandy crumbly texture with no large pieces of butter. Add water one spoon at a time until it is just starting to come together. Place mixture in a bowl and form into a flattened ball, divide in two wrap it in pastry and put in the fridge to rest for a minimum of 30 minutes.

Once the dough has rested, transfer to a floured work surface and roll out until about 1/8 of and inch thick. I have recently discovered that if you place a sheet of clingfilm over the dough as you roll it it resists breakage and sticking. Cut out with round pastry cutters (enough for top and bottom) and place in bun tins, spoon the prepared mincemeat into the individual pies and and then top with pastry cut outs.I used these cute little snowflake to top my pies but stars or plain rounds are good too. Just be careful not to overfill or they will stick and make removing the pies difficult. Bake at 200°C for about 20 minutes or until slightly golden.


***

Santa Claus apparently has a weakness for mince pies, so if you have any left...

Sunday, 13 December 2009

Pistachio & Cranberry Biscotti... and a declaration of love


A few weeks ago, having some well deserved time off, E. and I decided that we would finally go to Ottolenghi for lunch. It is something we had been saying we should do for ages and either due to being busy or more accurately lazy we had just not got round to it.

You see, I love Yotam Ottolenghi! I have been a fan for quite some time, regularly following his column The New Vegetarian in The Guardian, drooling over the wonderful recipes both sweet and savoury on an almost weekly basis. So last year for my birthday E. got me the Ottolenghi cookbook -and I didn't even have to drop any hints. The recipes are beautiful and I have to say that the hazelnut cupcakes have made me very popular at work and of course with E.

I have often passed by the Ottolenghi café in Islington, barely able to resist pressing my face against the windows. Cakes and meringues piled high take centre stage against the minimalist backdrop of the white walls and blackboard menus.


I don't know how it had taken us so long to visit but it was certainly worth the wait. The lunch menu, mainly a selection of interesting salads with a choice of main dishes, was fantastic. E. had seared beef with a broccoli & chilli salad. I stuck with the selection of salads and although I loved the roast beetroot with quince, my favourite was the wild rice with pistachio and cranberries. We both felt so fulfilled with our lunches that we decided to give the desserts a miss -we'll save them for another trip.

Eager to try the wild rice, pistachio & cranberry salad at home I started searching the Ottolenghi cookbook to see if the recipe had been included. Sadly it was not but I did come across a recipe for Pistachio & Ginger Biscotti, which I thought could easily be adjusted to include cranberries. 


This recipe is quite different from most biscotti recipes that I have tried in that the dough is quite soft and you need to scoop in onto the baking sheet.  A bit more difficult to work with but absolutely delicious. These are perfect for dipping in coffee -or tea in the case of E. He finished off the entire batch in record time.


Pistachio & Cranberry Biscotti
adapted from
Ottolenghi 
80 g unsalted butter
110 g caster sugar
2 eggs
1 tsp brandy
grated zest of 2 oranges
200 g plain flour
1/2 tsp ground ginger
1/4 tsp salt
80 g pistachio nuts, shelled
70 g dried cranberries

In a bowl cream butter and sugar together until fluffy and pale. Add eggs one by one and then add brandy and orange zest.

Sift flour, ginger and salt in to the butter/egg mixture and mix until fully incorporated. Add pistachios and cranberries and knead into the dough. The dough will be a bit stickier than most biscotti recipes but this is because they are slightly softer than most. If you want a firmer dough add more flour bit by bit .

Scoop the dough onto a parchment lined baking tray forming a log shape, sprinkling extra flour if the dough is too sticky to work with. Refrigerate for 30 minutes.

Now bake in a preheated oven at 170
°C for 20 minutes and then remove from oven to cool. Increase your oven temperature to 130°C. One cool slice slice the log across into 1 cm slices with a serrated knife. Lay the slices on their side and return to the oven and bake for another 40 minutes. They should be golden in colour.


***


I am pleased to report that this story has a double happy ending because not only did I find a delicious recipe to kick off the Christmas baking season, but also I tracked down my wild rice salad with pistachio recipe (just replace dried apricots for dried cranberries).


Sunday, 6 December 2009

Overnight Waffles with Caramelised Cinnamon Apples


This seemed like the perfect weekend for waffles, rainy & grey. There is something very comforting about having warm delicious food when the weather is foul. Now usually I opt for healthy breakfasts, most days its porridge with either banana & maple syrup or a bit of chopped apple & cinnamon, and always a sprinkling of flax seed. Sometimes for a change at weekends E. and I will have egg & soldiers. I am amused how E. so enthusiastically dips his toast soldiers into the yolks.

But for ages I felt like something was missing from our breakfast routine; admittedly we do occasionally have pancakes but what I really wanted was waffles. Although pancakes were popular in my family growing up we never had a waffle iron. Occasionally my mom would buy some frozen waffles but those were just not he same. E. was opposed to having another kitchen appliance, despite my advertising campaigns asserting that our quality of life would improve if we only had golden crispy-on-the-outside-fluffy-on-the-inside waffles on a Sunday morning. Then, just as I thought all was lost my girls came through; Roz somehow convinced E. that a waffle iron would make the perfect gift for my birthday.

So these rainy Sunday morning waffles are dedicated to Eimear, Sue, Anna & Rozzy, who presented me with my very own waffle iron for my birthday last year.

These yeast waffles appealed to my senses as I like the softness I imagined they would bring. I do like traditional crispy waffles but I especially love the texture of Belgian waffles and these seemed to be a close match. As for the apple topping, what can I say..., apples are in season and so yummy right now. Sprinkled with cinnamon and a pinch of nutmeg an everyday staple like apples become almost ambrosial.


Overnight Yeast Waffles
Adapted from Cookography
440 g plain flour
1/2 tsp salt
2 tbsp sugar
1 tsp yeast (active dry or instant)
Pinch of nutmeg
400 ml milk
60 ml water
3 eggs
55 g butter, melted and cooled

Combine flour, yeast, sugar and salt in a large bowl, mix to combine.

In a separate bowl, beat eggs and then stir in the milk, water and butter.
Add the liquid ingredients to the dry ingredients and mix until well combined.
Cover and refrigerate overnight.

In the morning take the batter out of the fridge and let the batter warm to room temperature if possible. Pour the batter onto pre-heated waffle iron.

These only took a couple of minutes to cook, once the waffle iron stops steaming they are done. This recipe made 12 waffles so I froze half.


Caramelised Apples
1 tbsp. unsalted butter
5 apples, peeled, cored and sliced
1/3 cup sugar (depending on how sweet the apples are to start)
1 tsp cornflour (dissolved in 3 tbsp of warm water)
1/2 tsp ground cinnamon
1/4 tsp ground nutmeg

Put apples in a sauce pan over medium-high heat with 1 tbsp of water. Once a bit softened add the sugar, cinnamon and nutmeg and corn starch mixture. When the apples are nearly cooked add butter and cook for another few minutes. The apples should be golden and syrupy. Add to waffles.

Somewhat miraculously the rain ceased and we soon saw one of the sunniest days we have had in ages. So while the rain was useful to set the scene for the waffle experience I must say I was thrilled to get some sunshine- a rare treat for London in December.


Thursday, 26 November 2009

Christmas Pudding: Part 1


A couple of weeks ago while I was strolling around a market in a lovely little town in Gran Canaria I came across several stalls selling linens. More specifically they were selling Christmas themed linens; tablecloths, tea towels and aprons, all decorated with Santas, pointsettias, angels, etc... It reminded me of when I was a child when the Sears Christmas Catalogue would arrive and I would spend ages looking through the pages of Christmassy homewares. I could not understand why my mom did not have reindeer patterned plates, it seemed like an important element missing from our lives. I decided that when I grew up I would have my very own set of Christmas themed table settings. Looking at them now I could only laugh as they seemed especially absurd given the 28 °C temperature and blazing sunshine. It reminded me that before i left for my relaxing holiday in the sun I had mixed my Christmas puddings and would need to steam them upon my return.


I love making Christmas puddings, it is such a long process involving several steps but I love each one. I love shopping for the ingredients and liberally pouring in the brandy. I love the stirring up and calling E. into the kitchen to have a few stirs, I love tying up   the puddings and I love the six hours of steaming each pudding (or slightly less as I made some smaller puds this year). I love giving home-made pudding to people as gifts as they are always so excited. I love saturating it with warmed brandy and then setting it alight.


The wonderful thing about Christmas puddings is that you can change the ingredients to suit your own tastes. Don't like almonds, that's okay use pecans or hazelnuts. Not a fan of brandy, use rum. Big nutmeg fan, add more!


Christmas Pudding
Adapted from
Gary Rhodes 
225 g plain flour
1 tsp baking powder
225 g white breadcrumbs
250 g shredded suet
100 g ground almonds (I also added a handful of whole almonds)
500 g soft dark brown sugar
1 tsp ground ginger
½ tsp grated nutmeg
1 tsp cinnamon
3-4 peeled carrots, grated
175 g stoned prunes, finely chopped
600 g mixed currants, sultanas & raisins (I used luxury mixed fruit)
100 g chopped mixed peel
50 g candied ginger, chopped
100 g glace cherries
2 apples, peeled, cored and roughly chopped
Juice & grated zest of 1 orange & 1 lemon
5 eggs
125 ml brandy (or liquor of your choice)
4 tbsp black treacle
4 tbsp golden syrup
300 ml Guinness


In a large mixing bowl, sift together the flour, baking powder and spices. Add the breadcrumbs, suet, ground almonds and brown sugar Add the chopped prunes, grated carrots, dried fruit, mixed peel, apples and lemon & orange zest. Beat the eggs together and stir into the dry ingredients along with the lemon & orange juices, rum, treacle, golden syrup and Guinness.


Mix the ingredients are well incorporated and fairly gloopy, now call anyone in the house to help stir- clockwise for good luck. Don't forget to make a wish!


Cover the bowl with cling wrap and refrigerate for up to one week to allow the mix to mature.

Pou
r into greased and floured pudding bowls, tie and steam steam steam  ! I used 2x 1litre bowls and 2x 500ml bowls. I steamed the larger puds for six hours and the smaller puds for 4 hours. Make sure that the water comes up about halfway up the side of the pudding in either a steamer basket or use an upturned saucer. Steam longer if you want a deeper colour for your pudding. If you wish to add the traditional 50 pence peace remember to clean well by soaking in vinegar or soda water.

Once cool, re-tie the pudding using clean foil and parchment and store until the big day.

On Christmas day steam for another hour and half to two hours and serve with brandy butter or cream.

In Part 2 I will tell you about the time I stole (I mean liberated) a piece of holly from a Madrid Hotel to top my pudding.

Stay Tuned


Sunday, 15 November 2009

My First Ever Macarons!


After what seems like an eternity of oohing and ahhing over so many beautiful macaron related blog posts, I finally decided to be brave and make my own. I have never had the pleasure of tasting the french Ladurée or Pierre Hermé versions, only some from Paul and Maison Blanc so I am not an expert of what constitutes the perfect macaron. While some prefer their macarons with just enough filling to hold them together, I prefer a generous dollop of buttercream or ganache. My favourite flavour is pistachio but I decided my first batch should be simple so I went with plain almond.

 I had actually considered taking a class to learn the basics but having bookmarked so many recipes and how-to pages this year, I thought I should at least be able to make a fair attempt on my own. I honestly thought I would be posting about my first failed undertaking of macarons, with the knowledge that it would be a useful exercise- I could at least learn from my mistakes and improve my technique. However I am as shocked and amazed as anyone that they have turned out as well as they have, not perfect and here is a few reasons why:

  • they are a bit too big so next time I will need to use a smaller pastry tip.
  • the first tray browned a little too quickly so I ended up under-baking them; I put the second tray lower down in the oven and that helped a lot. Next time I will also rotate the pan for more even baking.
  • they could have a slightly better dome so I will need to pay attention to the consistency and maybe use older egg whites.
 I have to say that when I saw them raising to a slight dome I was quite excited but when I also noticed they had developed little feet I could barely contain myself. It is possible that I may have actually jumped up and down and there may have also been a macarons induced screech.


Basic Almond Macarons
adapted from Serious Eats
225 grams icing sugar (sifted)
125 grams almonds
110 grams egg whites (some suggest 24-48 hours old egg whites but I didn’t bother)
30 grams caster sugar
Pinch of salt


Blitz almonds in a food processor until finely textured and then sift. Mix the almonds and icing sugar in a bowl and set aside.In a large clean, dry bowl whisk the egg whites and salt on medium speed until foamy. Increase the speed to high and gradually add granulated sugar. Whisk until they form stiff peaks. Gradually fold in icing sugar/ almond mixture into egg whites until completely incorporated. The mixture should be shiny and 'flow like magma.' When small peaks dissolve to a flat surface, stop mixing.

Fit a piping bag with a 1cm round tip (my tip was too big which resulted in larger than usual macarons). Pipe the batter onto parchment lined baking sheets and tap the underside of the baking sheet to remove air bubbles. Let the piped macarons dry at room temperature for about 15-30 minutes to allow skins to form.

Bake at 160°C oven for 10 to 11 minutes. Use a wooden spoon to keep the oven door slightly ajar, and rotate the baking sheet after 5 minutes for even baking. Once out of the oven poor a few drops of water under the the parchment- the steam will help release the macarons from the paper.


Vanilla Buttercream Filling
adapted from Kitchen Musings
3 egg yolks
115 grams plus 2 tbs sugar
225g butter, at room temperature
1tsp vanilla extract


In a clean glass or metal bowl, combine the yolks and 2 tablespoons of the sugar and whisk for 30 seconds. Simultaneously, in a small saucepan with the remaining ½ cup of sugar, and 3 tablespoons of water. Cook over high heat until the mixture reaches 120 °C. Stir vanilla extract into the boiling syrup. Drizzle the vanilla syrup down the side of the bowl into the egg yolks, whisking them briskly to blend. Continue whisking the egg yolk mixture until the yolks have tripled in volume and have cooled. Add the butter and whisk until the buttercream is fluffy and creamy with stiff, shiny, pointy peaks. Pipe one macaron with as much filling as you like and sandwich together.


While I realise that the overall success of my macarons is probably down to luck, I do feel quite proud of myself. I can't wait to make another batch... and neither can E.


Sunday, 18 October 2009

Pumpkin Pie Memories


Last weekend was Thanksgiving in Canada, in the (almost) 11 years since I left home for London, the day has passed me by without any thought of it. This year however I was feeling a bit nostalgic, maybe its because I was just home to Canada a few months ago and memories seem fresher or maybe I was just craving some pumpkin pie. Either way it seemed like the right time to have a proper Thanksgiving Dinner.

Pumpkin pie is the perfect nostalgic comfort food as it always strikes me as a bit retro. I know it's a classic but somehow I can't help but to imagine it being taken out of an avocado coloured oven and left to cool on a glittered formica table top. It reminds me of autumn afternoons in eastern Canada; the smell of wood stoves in the cool air and burnished leaves rustling underfoot. It reminds me of home.

I searched for quite a while for the right recipe, specifically looking for recipes that did not need evaporated milk (I am sure they sell it in the UK but I have never actually seen it), in the end I adapted a recipe from the joyofbaking.com for the filling and used my own recipe for the shortcrust pastry. My mother always used to say that squash makes better pie than pumpkin but I decided to stick with pumpkin, a beauty from Borough Market!

 Shortcrust Pastry
 3
00 grams of plain flour
1/2 tsp salt
90 grams of cold unsalted butter (cut into small pieces)
60 grams of vegetable shortening (I use Trex but Crisco is fine)
3 or 4 tsp ice water

In a food processor blend the flour and with the butter and shortening until its combined to a sandy crumbly texture with no large pieces of butter. Add water one spoon at a time until it is just starting to come together. Place mixture in a bowl and form into a flattened ball, divide in two wrap it in pastry and put in the fridge to rest for a minimum of 30 minutes.


Once the dough has rested, transfer to a floured work surface and roll out until about 1/8 of and inch thick. I have recently discovered that if you place a sheet of clingfilm over the dough as you roll it it resists breakage and sticking. Transfer into a 9 inch pie dish and trim excess dough leaving about 1.5 inches. Pinch the edges of the dough to form the crust edge.

Pumpkin Filling
Adapted from joyofbaking.com
6 Large eggs
1 kilogram cooked pumpkin
250 ml whipping cream
225 grams of brown sugar
3 tsp cinnamon
 1 1/2 tsp ground ginger
 1/4 tsp ground nutmeg
 1/8 tsp ground cloves


Whisk eggs with with brown sugar and spices and the add whipping cream and mashed pumpkin. Stir until smooth but being careful not over mix or the pie may crack. Fill the unbaked crust with the prepared filling and bake at 190 degrees C for 45-50 minutes.

Make 2x 9 inch pies or many little pies

Note: I was excited to try the tip of sprinkling the uncooked pastry with toasted pecans and gingersnaps (gingernuts here in England) to keep the crust from going soggy. So I toasted the pecans and ground them with gingersnaps... and then found them on the counter once the pie was already in the oven- oops!


My guests, of both English and Spanish origin, seemed entertained by the whole experience having only experienced Thanksgiving via television. I was uncertain if Pumpkin Pie would be a success on this side of the pond but I am pleased to report that it was finished nicely off with several mini pies wrapped up and taken home.